You’ve made the switch to organic rice and millets. You’ve invested in traditional rice varieties like Kattuyanam and Poongar. You’ve stocked up on nutritious millets like foxtail and barnyard. You’re committed to eating healthier.
Then you open your storage container a month later and find your premium organic grains infested with bugs. Or worse, they smell musty and stale. All that money spent on quality organic products, wasted because of improper storage.
This is heartbreaking, but it’s also completely preventable.
Here’s what most people don’t realize: organic grains require different storage methods than conventional ones. Without chemical fumigants and preservatives, organic rice and millets are more vulnerable to pests, moisture, and rancidity. But with the right storage techniques, they’ll stay fresh, nutritious, and pest-free for months.
This comprehensive guide will teach you everything you need to know about storing organic rice and millets properly, so your investment in healthy food doesn’t go to waste.
Why Organic Grains Need Special Storage
Before diving into storage methods, let’s understand why organic grains are different.
What Makes Organic Grains More Vulnerable?
No Chemical Fumigation: Conventional grains are often treated with chemical fumigants that kill insects and their eggs. Organic grains skip this step, making them more susceptible to infestation.
Retained Bran Layer: Many organic rice varieties like red rice, black rice, and Poongar rice are unpolished, meaning they retain the nutritious bran layer. This bran contains oils that can go rancid if not stored properly.
No Preservatives: Organic grains contain no artificial preservatives to extend shelf life.
Higher Moisture in Some Cases: Some organic grains, especially hand-pounded varieties, may have slightly higher moisture content than commercially processed grains.
Natural Oils: Millets like foxtail millet and barnyard millet contain natural oils that, while healthy, can turn rancid with improper storage.
The Good News
These vulnerabilities don’t mean organic grains are inferior. They just mean you need to be smarter about storage. With proper techniques, organic rice and millets stay fresh for 6-12 months easily, maintaining all their nutritional benefits and flavor.
The Three Enemies of Grain Storage
Understanding what damages stored grains helps you protect them effectively.
Enemy #1: Moisture
The Problem:
- Moisture encourages mold and fungal growth
- Creates ideal conditions for insect eggs to hatch
- Causes grains to clump together
- Accelerates rancidity in oil-containing grains
Ideal moisture level: Below 12% for long-term storage
Signs of moisture damage:
- Musty smell
- Visible mold (white, green, or black spots)
- Grains stuck together in clumps
- Slimy texture
Enemy #2: Heat and Light
The Problem:
- Heat accelerates oil rancidity in bran layer and millets
- Light (especially sunlight) degrades vitamins and causes oxidation
- Both reduce nutritional value over time
- Create favorable conditions for pests
Ideal temperature: Below 15°C (60°F) for long-term storage, room temperature acceptable for short-term
Signs of heat/light damage:
- Stale or rancid smell
- Change in color (fading or darkening)
- Loss of characteristic aroma
Enemy #3: Pests
The Problem:
- Rice weevils, grain moths, and beetles infest stored grains
- Pests consume grains and contaminate with droppings
- Some pests come already present as eggs in the grain
- Once established, infestations spread rapidly
Common grain pests:
- Rice weevils (small brown beetles with long snouts)
- Grain moths (small brown flying insects)
- Flour beetles
- Indian meal moths
Signs of infestation:
- Visible insects crawling in grains
- Webbing or silk-like threads
- Larvae or pupae in grains
- Hollow grains (eaten from inside)
- Fine powder or dust (insect droppings)
The Perfect Storage Environment
Create these conditions and your grains will stay fresh for months.
Temperature
Ideal: 10-15°C (50-60°F)
Acceptable: Room temperature up to 25°C (77°F) for 3-6 months
Best practice:
- Store in the coolest part of your home (not near stove or in direct sunlight)
- Refrigerate if you have space (especially for millets)
- Freeze for 48 hours after purchase to kill any eggs, then transfer to regular storage
Humidity
Ideal: Below 60% relative humidity
Best practice:
- Avoid storing near sink, dishwasher, or bathroom
- Don’t store in damp basements
- Use silica gel packets in containers if you live in humid climate
- Ensure grains are completely dry before storing
Light
Ideal: Complete darkness
Best practice:
- Use opaque containers (not clear glass or plastic)
- Store in closed cabinets or pantry
- Keep away from windows
- If using clear containers, cover with cloth or store in dark area
Air Circulation
Ideal: Airtight containers to prevent oxygen exposure
Best practice:
- Use containers with tight-fitting lids
- Remove as much air as possible before sealing
- For very long-term storage, consider vacuum sealing
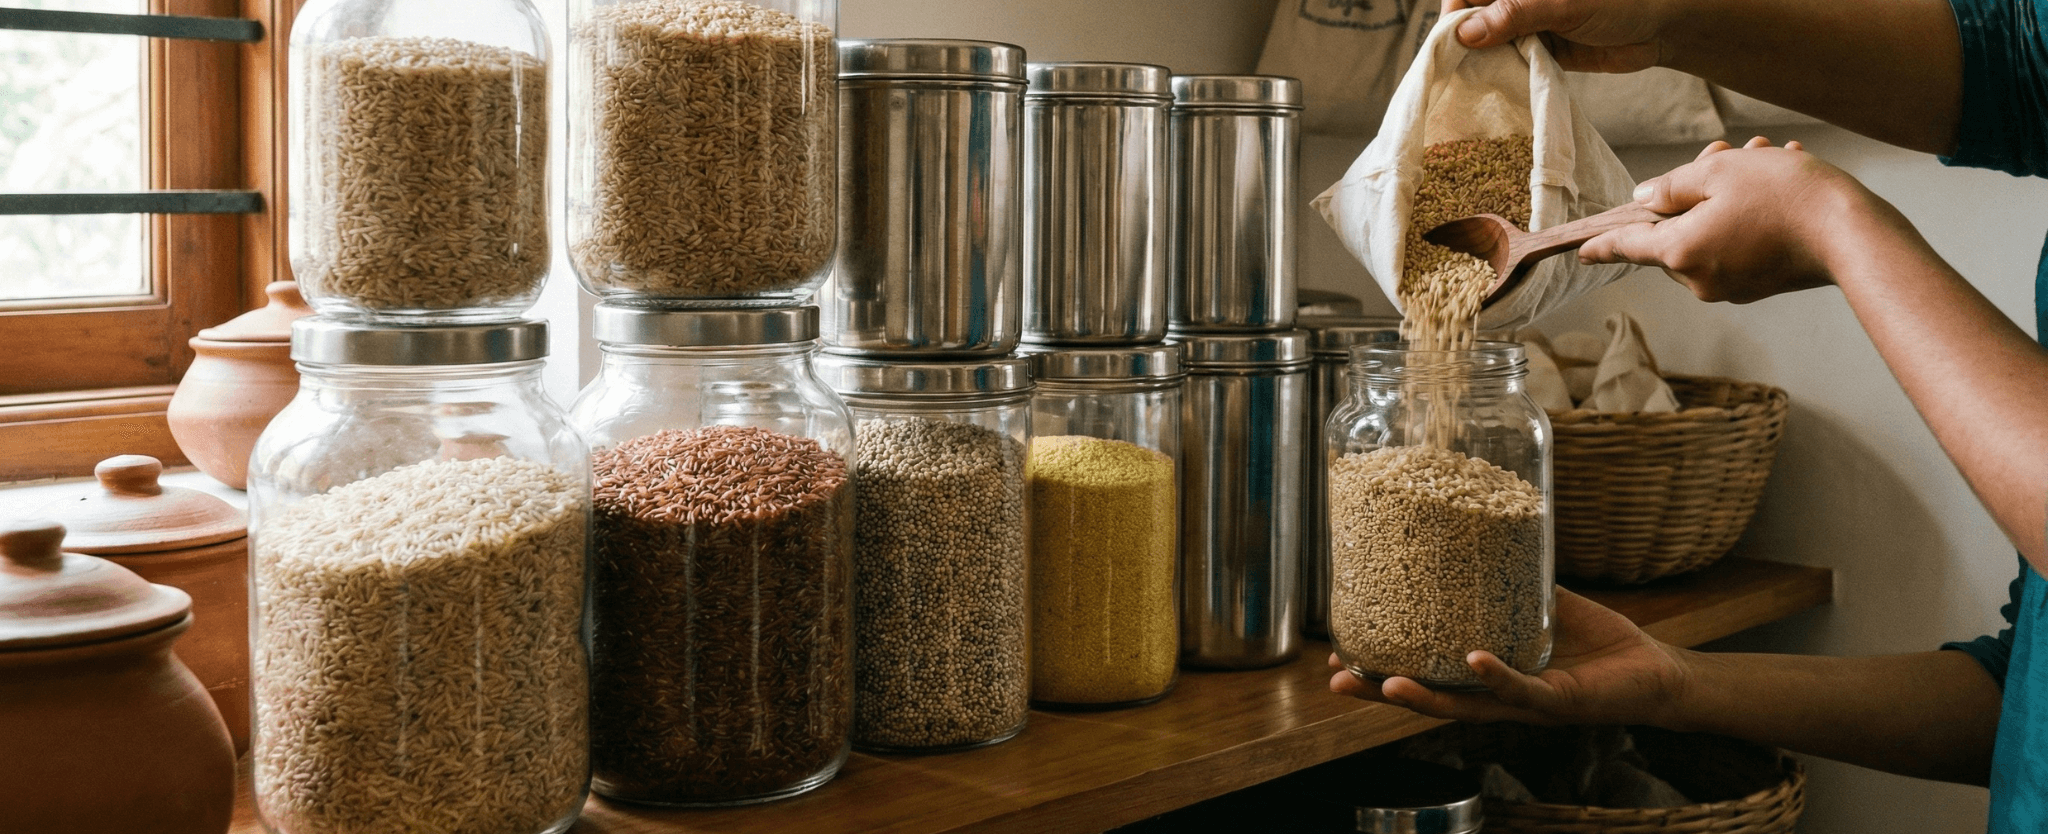
Choosing the Right Storage Containers
The container you choose makes a massive difference.
Best Container Options
- Food-Grade Plastic Containers with Airtight Lids
Pros:
- Lightweight and unbreakable
- Widely available and affordable
- Easy to see grain levels if semi-transparent
- Various sizes available
Cons:
- Not completely moisture-proof long-term
- Can absorb odors over time
- Lower-quality plastic may leach chemicals
Best for: Short to medium-term storage (3-6 months)
What to buy: Look for BPA-free, food-grade plastic with rubber-seal lids
- Glass Jars with Airtight Seals
Pros:
- Completely non-reactive
- No chemical leaching concerns
- Easy to see contents
- Easy to clean thoroughly
Cons:
- Transparent (light exposure unless covered)
- Heavy and breakable
- More expensive than plastic
Best for: Smaller quantities, daily-use grains, aesthetic pantry display (if covered from light)
What to buy: Mason jars or clip-top jars with rubber gaskets
- Stainless Steel Containers
Pros:
- Durable and long-lasting
- Blocks light completely
- No chemical concerns
- Keeps grains cooler than plastic
Cons:
- More expensive
- Can’t see contents without opening
- Heavier than plastic
Best for: Long-term storage, large quantities, high-value organic grains
What to buy: Food-grade stainless steel with tight-fitting lids
- Traditional Clay/Ceramic Containers
Pros:
- Breathable (allows some air circulation)
- Keeps grains cool naturally
- Traditional and aesthetic
- No chemicals
Cons:
- Not airtight (needs additional protection in humid climates)
- Breakable
- Harder to find in right sizes
Best for: Dry climates, traditional kitchens, grains consumed within 2-3 months
What to buy: Our clay serving pots can work for grain storage in appropriate sizes
- Mylar Bags with Oxygen Absorbers
Pros:
- Creates oxygen-free environment
- Blocks all light
- Lightweight and space-efficient
- Excellent for very long-term storage
Cons:
- Not reusable
- Can’t see contents
- Needs proper sealing equipment
Best for: Long-term storage (1-2 years), bulk purchases, emergency preparedness
Container Sizes: What You Need
Daily Use Container (1-2 kg capacity):
- Keep near stove/cooking area
- Refill weekly from main storage
- Easy access for daily cooking
Main Storage Container (5-10 kg capacity):
- Store in pantry or cool area
- Refill daily container as needed
- Holds one month’s supply
Bulk Storage (25 kg bags or multiple containers):
- For large families or bulk buyers
- Store in coolest part of home
- Transfer to smaller containers as needed
Pre-Storage Treatment: Kill Hidden Pests
Even certified organic grains can have microscopic insect eggs. This treatment ensures they don’t hatch in your storage.
Freezing Method (Recommended)
How it works: Extreme cold kills all life stages of insects – eggs, larvae, pupae, and adults.
Steps:
- Place grains in sealed bags
- Put in freezer for 48-72 hours
- Remove and let come to room temperature (don’t open bags until warmed)
- Transfer to storage containers
Why it’s best: Completely chemical-free, 100% effective, doesn’t affect grain quality
Limitation: Requires freezer space
Sun Drying Method
How it works: Heat and UV light kill some insects and reduce moisture.
Steps:
- Spread grains on clean cloth in direct sunlight
- Leave for 4-6 hours on a hot day
- Stir occasionally for even drying
- Let cool completely
- Transfer to storage containers
Effectiveness: 60-70% effective, primarily reduces moisture
Limitation: Doesn’t kill all eggs deep inside grains, depends on weather
Neem Leaf Method (Traditional)
How it works: Neem’s natural insect-repelling properties deter pests.
Steps:
- Dry fresh neem leaves completely
- Place a few dried leaves in storage container
- Layer grains on top
- Add more leaves every 2-3 inches of grain
- Seal container
Effectiveness: Preventive, not curative. Won’t kill existing pests but deters new infestations.
Best used: In combination with freezing method
Bay Leaf Method
How it works: Bay leaves release oils that repel grain pests.
Steps:
- Place 4-5 bay leaves per kg of grain
- Distribute throughout container
- Replace leaves every 3 months
Effectiveness: Similar to neem, preventive measure
Bonus: Adds pleasant aroma to grains
Step-by-Step Storage Process
Follow this process for maximum freshness and pest prevention.
Step 1: Inspect Your Grains
Before storing, examine the grains carefully:
- Look for visible insects or webbing
- Check for off odors (musty or rancid)
- Feel for excess moisture (grains should be dry, not sticky)
- Look for discoloration or damaged grains
If you find issues: Don’t store. Contact your supplier for replacement.
Step 2: Pre-Treatment
Choose one method:
- Freezer method (best): 48-72 hours in freezer
- Sun drying (if no freezer space): 4-6 hours on hot day
- Skip if grain is from very trusted source and you’ll consume within 2-3 weeks
Step 3: Prepare Containers
- Wash and dry containers thoroughly
- Ensure no moisture remains
- Check that lids seal properly
- Add silica gel packet if in humid climate
- Add bay leaves or dried neem leaves
Step 4: Fill Containers
- Pour dry grains into container
- Don’t overfill – leave 1-2 inches space at top
- Remove as much air as possible
- Seal tightly
Step 5: Label Clearly
Label each container with:
- Type of grain (Poongar rice, Foxtail millet, etc.)
- Date of storage
- Best before date (6-9 months from storage date)
- Any special notes (organic, unpolished, etc.)
Step 6: Store Properly
- Place in cool, dark, dry location
- Stack containers carefully (heavier on bottom)
- Keep away from strong-smelling items (grains absorb odors)
- Ensure good air circulation around containers
Specific Storage Guidelines by Grain Type
Different grains have different storage needs.
White/Polished Rice
Shelf life: 12-18 months properly stored
Storage needs:
- Easiest to store (no bran oils to go rancid)
- Room temperature acceptable
- Airtight container essential
- Main concern is pest prevention
Best containers: Any airtight food-grade container
Special tip: Can last years if vacuum sealed with oxygen absorbers
Unpolished/Brown Rice Varieties
Examples: Red rice, black rice, Poongar rice, Kattuyanam rice
Shelf life: 6-9 months at room temperature, 12 months refrigerated
Storage needs:
- More delicate due to bran layer oils
- Cool storage highly recommended
- Airtight container essential
- Check monthly for rancid smell
Best containers: Opaque containers (stainless steel or covered glass)
Special tip: Store in refrigerator if you live in hot, humid climate or won’t consume within 3 months
Millets
Examples: Foxtail millet, barnyard millet, little millet, ragi, pearl millet
Shelf life: 6-8 months at room temperature, 12 months refrigerated
Storage needs:
- Contain oils that can go rancid
- Very important to keep cool and dark
- Extremely important to keep dry (small grains compact easily with moisture)
- Pre-freezing highly recommended
Best containers: Opaque, airtight containers; consider refrigeration
Special tip: Buy smaller quantities more frequently rather than bulk buying millets
Rice Flour and Millet Flours
Examples: Black rice flour, Poongar rice flour, ragi flour
Shelf life: 3-4 months at room temperature, 6-8 months refrigerated
Storage needs:
- Much more vulnerable to rancidity than whole grains
- Refrigeration strongly recommended
- Airtight container absolutely essential
- Check frequently for off odors
Best containers: Airtight glass or plastic in refrigerator
Special tip: Grind whole grains fresh if possible, or buy flour in small quantities
Seasonal Storage Considerations
Storage strategies should adapt to seasons in India.
Summer Storage (March-June)
Challenges: High heat accelerates rancidity and increases pest activity
Solutions:
- Move grains to coolest part of house
- Consider refrigerating unpolished rice and millets
- Check containers weekly for signs of infestation
- Use bay leaves or neem leaves liberally
- Don’t buy bulk quantities during summer months
Monsoon Storage (July-September)
Challenges: High humidity causes moisture problems and mold
Solutions:
- Use silica gel packets in every container
- Ensure containers seal perfectly
- Check grains more frequently (every 2 weeks)
- Sun dry grains on sunny days between rains
- Keep containers elevated off floor (moisture rises)
- Never store in ground-level locations prone to dampness
Winter Storage (October-February)
Challenges: Minimal challenges, ideal storage season
Solutions:
- Best time to buy bulk quantities
- Cool temperatures naturally preserve grains
- Still maintain airtight containers
- Can extend storage duration during these months
Signs Your Stored Grains Have Gone Bad
Know when to throw away and when it’s still good.
Definitely Throw Away If:
Visible mold: Any green, white, or black fuzzy growth on grains
Strong musty or rancid smell: Not just “old grain” smell but actively unpleasant
Visible live insects: Weevils, moths, larvae moving in grains
Extensive webbing: Silk-like threads covering grains (grain moth infestation)
Slimy or sticky texture: Indicates moisture damage and possible bacterial growth
Discoloration: Significant darkening or unusual color changes
Still Usable (with Caution) If:
Mild stale smell: Can be refreshed by sun drying or toasting before cooking
Few dead insects: Remove visible insects, check thoroughly, sun dry, and use soon
Slight clumping: Separate clumps, check for moisture source, sun dry, and use immediately
Slightly past best-before date: If stored properly and smells/looks fine, still safe to eat
Extending Shelf Life: Advanced Techniques
For those serious about long-term grain storage.
Vacuum Sealing
How it works: Removes oxygen, preventing oxidation and pest development
Equipment needed: Vacuum sealer machine and bags
Process:
- Freeze grains for 48 hours
- Let come to room temperature
- Portion into vacuum seal bags (2-5 kg portions)
- Vacuum seal
- Store in cool, dark place
Shelf life achieved: 2-3 years for most grains
Best for: Bulk buyers, rare rice varieties, long-term emergency storage
Oxygen Absorber Packets
How it works: Iron powder packets absorb oxygen inside sealed containers
Where to buy: Food storage supply stores, online
Process:
- Fill container with grain
- Place oxygen absorber packet on top
- Seal immediately (absorbers activate on air exposure)
- Store normally
Shelf life achieved: 1-2 years
Best for: Mylar bag storage, bulk quantities
Refrigerator/Freezer Storage
How it works: Cold temperatures halt all biological activity
Process:
- Place grains in airtight, moisture-proof containers
- Store in refrigerator (for 6-12 month storage) or freezer (for 1-2 year storage)
- When removing, let come to room temperature before opening (prevents condensation)
Shelf life achieved:
- Refrigerator: 12-18 months
- Freezer: 2+ years
Best for: Unpolished rice, millets, flours, humid climates
Limitation: Requires significant refrigerator/freezer space
Monthly Maintenance Checklist
Regular checking prevents problems from getting out of hand.
Every Month: Quick Check (5 minutes)
Visual inspection:
- Open each container
- Look for visible insects or webbing
- Check for clumping or moisture
- Sniff for any off odors
Container check:
- Ensure lids still seal tight
- Check silica gel packets (replace if saturated)
- Wipe down exterior of containers
Action if issues found:
- Small infestation: Sun dry, pick out insects, use grain immediately
- Moisture issues: Sun dry grains, fix humidity problem
- Rancid smell: Discard grain
Every 3 Months: Deep Check (15 minutes)
Everything from monthly check, plus:
- Pour out a portion of grain and examine closely
- Replace bay leaves or neem leaves
- Reorganize containers (rotate stock, use older grains first)
- Clean storage area (vacuum, wipe shelves)
Action items:
- Use grains approaching 6 months in storage first
- Refill daily-use containers
- Make note of which grains to buy/not buy next time
Every 6 Months: Complete Review (30 minutes)
Comprehensive inspection:
- Empty all containers
- Wash and dry containers thoroughly
- Examine all grains closely
- Sort and discard any questionable grains
Documentation:
- Review which grains stored well vs poorly
- Adjust storage methods as needed
- Plan future purchases based on usage patterns
Troubleshooting Common Storage Problems
Problem: Grain Moths Appeared Despite Precautions
Likely cause: Eggs were already in grain or entered during refilling
Solution:
- Freeze all grains for 72 hours immediately
- Thoroughly clean entire storage area
- Check all grains, even those in sealed containers
- Discard heavily infested grains
- Start fresh with proper freezing pre-treatment
Prevention: Always freeze new grain purchases before storing
Problem: Grains Smell Rancid After 3 Months
Likely cause: Oil in bran turned rancid due to heat or light exposure
Solution:
- Discard grains (cooking won’t remove rancidity)
- Move storage to cooler, darker location
- Consider refrigerating unpolished rice and millets
- Buy smaller quantities more frequently
Prevention: Store unpolished grains and millets in refrigerator from the start
Problem: Grains Clumped Together
Likely cause: Moisture exposure
Solution:
- Sun dry grains for 4-6 hours
- Break apart clumps
- Check for mold (if present, discard)
- Fix moisture source (better container seal, silica gel, different location)
Prevention: Use silica gel packets, ensure containers seal properly
Problem: Flour Developed Off-Smell Quickly
Likely cause: Flour goes rancid much faster than whole grains
Solution:
- Discard rancid flour
- Going forward, refrigerate all flours
- Buy smaller quantities (1 month supply max)
Prevention: Always refrigerate flour, buy fresh frequently
Buying Smart for Better Storage
Your storage success starts at purchase.
How Much to Buy at Once
Daily users (cooking rice/millet daily):
- Buy 1 month supply of main grains (5-10 kg)
- Buy 2-3 month supply of less-used varieties (2-5 kg)
- Buy flour fresh every 2-4 weeks (1 kg max)
Weekly users:
- Buy 2-3 month supply (5 kg)
- Smaller quantities of specialty varieties (1-2 kg)
Occasional users:
- Buy smallest available quantities (1-2 kg)
- Don’t bulk buy varieties you use rarely
What to Look for When Buying
Check packaging date: Fresher is better, especially for unpolished varieties
Inspect through packaging: Look for signs of insect damage or moisture
Smell if possible: Should smell fresh, not musty
Check for certification: Organic certification ensures no chemical treatments (but requires better storage)
Ask about storage: How long has it been stored before reaching you?
Seasonal Buying Strategy
Buy bulk in winter: Best storage conditions, grains last longest
Buy minimal in summer: Higher risk of spoilage, harder to store
Monsoon caution: Only buy what you’ll use in 4-6 weeks
Special Considerations for Different Households
Small Households (1-2 People)
Challenge: Grain goes bad before you finish it
Solution:
- Buy smallest quantities (1-2 kg)
- Focus on 2-3 varieties, not 10 different types
- Share bulk purchases with friends/family
- Use grains across multiple meals (breakfast, lunch, dinner)
Large Families (6+ People)
Challenge: Bulk storage without spoilage
Solution:
- Multiple storage containers for different grains
- Rotation system (use oldest first)
- Dedicated storage area with proper conditions
- Monthly stock taking and reorganization
Humid Climates (Coastal Areas, High Rainfall Regions)
Challenge: Moisture is constant enemy
Solution:
- Silica gel packets in every container (non-negotiable)
- Refrigerate unpolished rice and millets
- Check grains every 2 weeks during monsoon
- Buy smaller quantities, refresh more often
- Sun dry grains whenever possible on sunny days
Hot Climates (North India Summers, etc.)
Challenge: Heat accelerates rancidity
Solution:
- Store in coolest part of house (north-facing, ground floor)
- Refrigerate during peak summer months
- Avoid buying bulk quantities in summer
- Focus on polished rice in summer (less vulnerable)
- Use unpolished varieties quickly
Setting Up Your Grain Storage System
Ready to implement? Here’s your action plan.
Beginner Setup (Budget-Friendly)
Investment: ₹500-1000
What you need:
- 3-4 airtight plastic containers (5-10 kg capacity each)
- 1 smaller container for daily use (1-2 kg)
- Bay leaves (small packet)
- Labels and marker
Process:
- Freeze grains for 48 hours
- Transfer to containers with bay leaves
- Label clearly
- Store in coolest pantry space
Good for: Small to medium households starting with organic grains
Intermediate Setup (Recommended)
Investment: ₹2000-3000
What you need:
- 2-3 stainless steel containers (10 kg capacity)
- 3-4 glass jars for daily use and specialty grains
- Silica gel packets
- Bay leaves and/or dried neem leaves
- Proper labels
Process:
- Freeze all new purchases
- Main grains in steel containers with silica gel
- Daily use in glass jars
- Monthly checking routine
Good for: Families committed to organic eating, moderate storage needs
Advanced Setup (Serious Long-Term Storage)
Investment: ₹5000-10000
What you need:
- Multiple stainless steel containers (various sizes)
- Vacuum sealer and bags
- Oxygen absorber packets
- Dedicated storage shelves in cool area
- Comprehensive labeling system
- Hygrometer (moisture meter)
Process:
- Vacuum seal bulk quantities
- Refrigerate millets and unpolished rice
- Systematic rotation and documentation
- Perfect climate control
Good for: Large families, bulk buyers, long-term emergency preparedness
Final Thoughts: Storage is Part of the Investment
You’ve chosen to invest in your health by buying organic rice and millets. That’s a wonderful decision. But that investment is only protected if you store these precious grains properly.
Think of proper storage not as extra work, but as the final step in bringing quality food to your table. It’s the difference between throwing away 30% of what you buy and enjoying every last grain you paid for.
The good news? Once you set up a proper storage system, it becomes routine. A few minutes of monthly checking. Some basic pre-treatment when you buy. Smart container choices. That’s all it takes.
Your organic rice, millets, and pulses deserve to be stored with the same care that went into growing them organically. They traveled from farmers who lovingly cultivated them to your kitchen. Don’t let that journey end in a bug-infested container.
Store them right. Keep them fresh. Enjoy every nutritious, delicious bite.
Ready to stock up on quality organic grains? Browse our complete collection:
Traditional Rice:
- Kattuyanam Rice – Low GI, diabetic-friendly
- Poongar Rice – Women’s health
- Red Rice – Antioxidant-rich
- Black Rice – Maximum nutrition
- Browse all rice varieties
Organic Millets:
- Foxtail Millet – Everyday nutrition
- Barnyard Millet – Fasting grain
- Little Millet – Weight management
- Ragi (Finger Millet) – Calcium-rich
- Browse all millets
Flours:
All our grains are organically grown, carefully sourced, and delivered fresh. Store them right, and enjoy months of healthy eating!
Storage Quick Reference Card:
Before Storing: Freeze 48 hours → Dry completely → Add bay leaves
Container: Airtight, opaque, food-grade
Location: Cool, dark, dry (below 25°C, humidity below 60%)
Check: Monthly for insects, moisture, smell
Shelf Life:
- Polished rice: 12-18 months
- Unpolished rice: 6-9 months (12 in fridge)
- Millets: 6-8 months (12 in fridge)
- Flours: 3-4 months (refrigerate always)